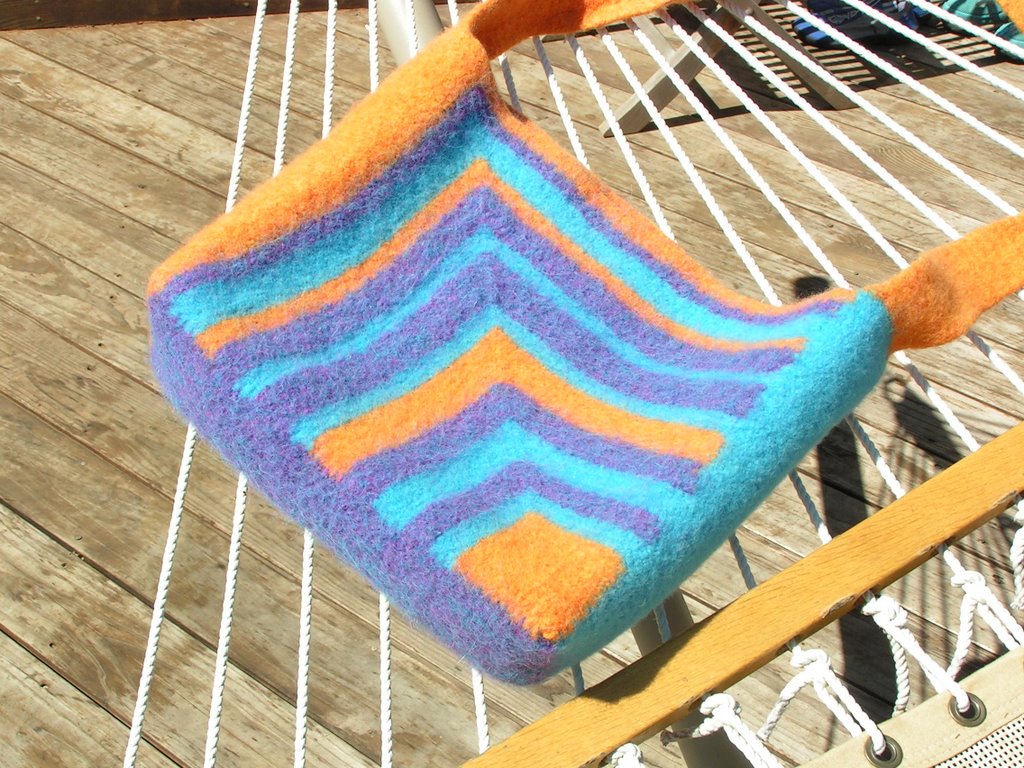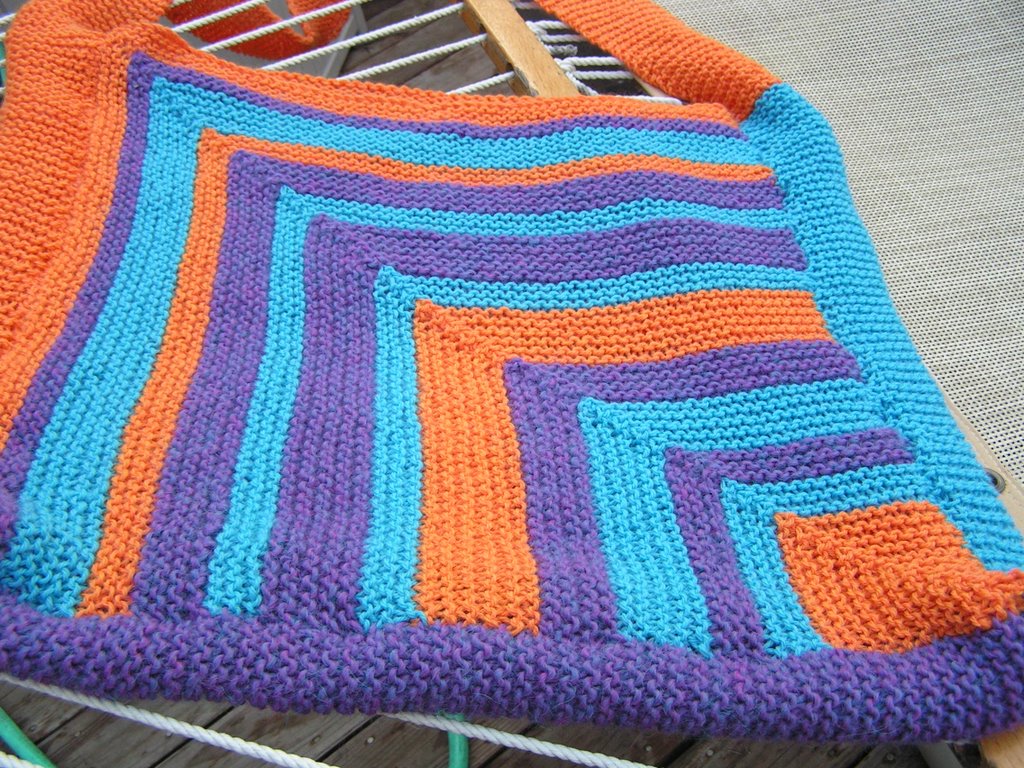
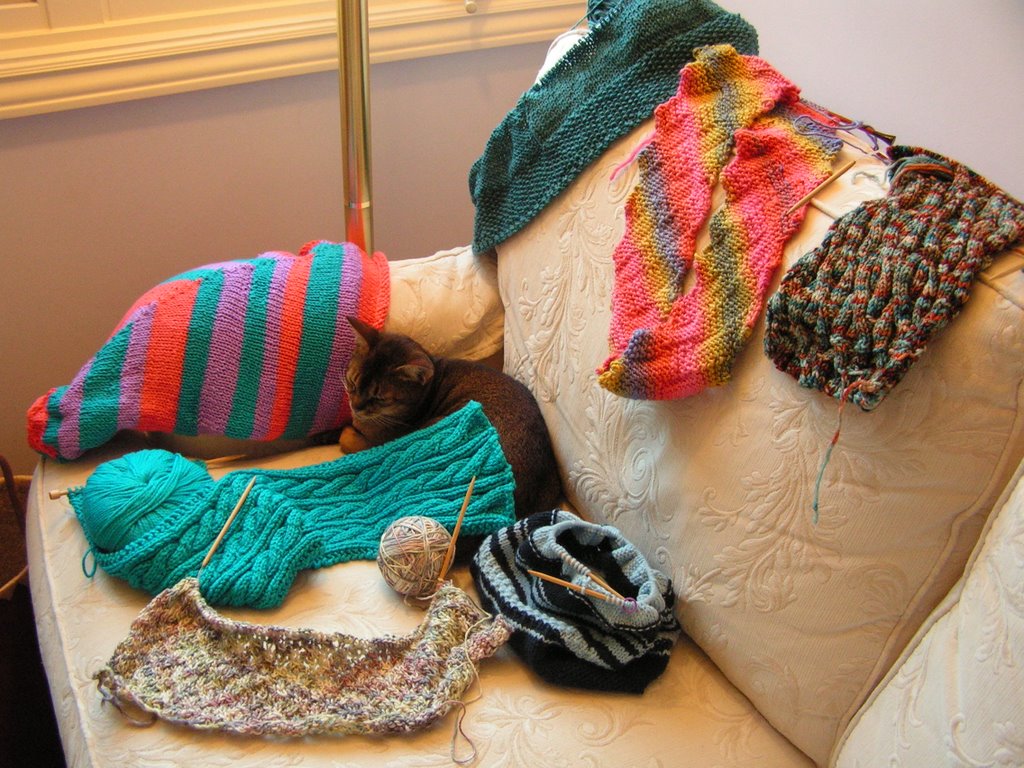
I have finished the baby blanket and am calling it a "Circular Mitred Square Blanket". I am very happy with how it turned out. I couldn't get the photos to show the colors very well but you can get the general idea. I made it with
Lions Brand Microspun and I love this yarn. It drapes really well and is very soft. Plus it can go in the washer and dryer which is a big plus for a baby blanket! I now need to try to block it because the edges are curling up a bit. Several of you have asked for the pattern so I'll give it a shot. I've never written a pattern for others to use so please let me know if you have any questions.
So here's the pattern. This blanket is worked in the round from the outside in so you start with A LOT of stitches on the needles. I wanted my blanket to be about 28 inches wide so using a size 9 circular needle I cast on 128 stitches per side for a total of 512 stitches! Basically you need to do a swatch with your yarn to figure out how many stitches per side and add 3 per side. I cast on 128 stitches, placed a marker and did that 3 more times making the last marker a different color so I knew where each round started. Then you join being careful not to twist (I twisted and you should have heard the explatives!)
Round 1 - *knit 125 stitches, knit 3 together* repeat from * to * to the end of the round
Round 2 - knit
Round 3 - *knit 123 stitches, knit 3 together* repeat from * to * to the end of the round
Round 4 - knit
Keep this going with all of the odd rounds decreasing by 2 stitches.
Then when you get towards the end - for me it was 12 stitches per section - I started decreasing every time I went around. Then when I was really near the end - about 12 stitches total - I cut the yarn long and used a needle to thread through all of the remaining stitches than pulled it tight light a hat but being careful not to let it pucker. At what point you need to start decreasing every round and then pull together will vary depending on how thick your yarn is. The thicker the yarn the sooner you'll need to do it. The thinner the yarn the closer you can get to the end. You just need to watch it so you don't end up with a stem!
A note about stitch markers - I used them and it really helped because I didn't want to have to count each row but on the rows when you knit the 3 together you move the stitch marker one stitch to the right so it will be in the right place the next time. For example - if it is knit 121 then knit 3 tog - you knit 121, slip the marker off, slip one knitted stitch to the left needle, slip the marker on and then slip the knittied stitch back to the right needle and then knit your 3 together. Why only one stitch over when the sections are decreasing by 2 each? Because you are losing a stitch on each end of the section. Hope this is helpful and not confusing!
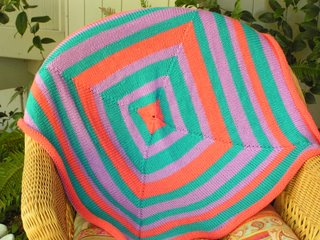
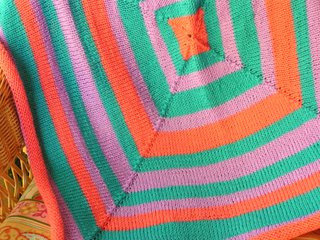
Thanks to Helen for pointing out I forgot to say how much yarn I used! I used 2 skeins each of 3 colors but I had some of each color left so probably no more than 5 skeins total yarn. A lot will depend on how many colors you choose to use and how you stripe it.
Bury the ends. That's it! You can stripe it however you want. If you want to know the stripe count I used or if you have any questions just send me an e-mail at lahamltAgmailDOTcom. This pattern is copyrighted by me - please use it for your personal enjoyment but not for profit. Have fun and if you do knit one of these I'd love for you to send me a photo.
 We are having a wonderful time here in the Pacific Northwest and I just couldn't resist sharing this photo with you. The kayaks were so colorful and you can see in the corner they also had these adorable ones that look like crocodiles. Master JET really wanted to go in one of those. I have also had some time to do some knitting that requires more attention. I recently came across this Barbara Walker Mosaic Knitting and I found it intriquing. You create all sorts of geometric patterns but rather than having spools or switching yarn often as you do in Fair Isle you instead use only one color for two rows and then the other color for two rows. That way you just carry the yarn up the end and don't have to stop and start yarns all the time. Here is a sample of a very simple pattern. It is fun and fairly easy so I think I will do more mosaic knitting. We'll see though as you really have to pay attention to the chart. Definitely not mindless knitting!
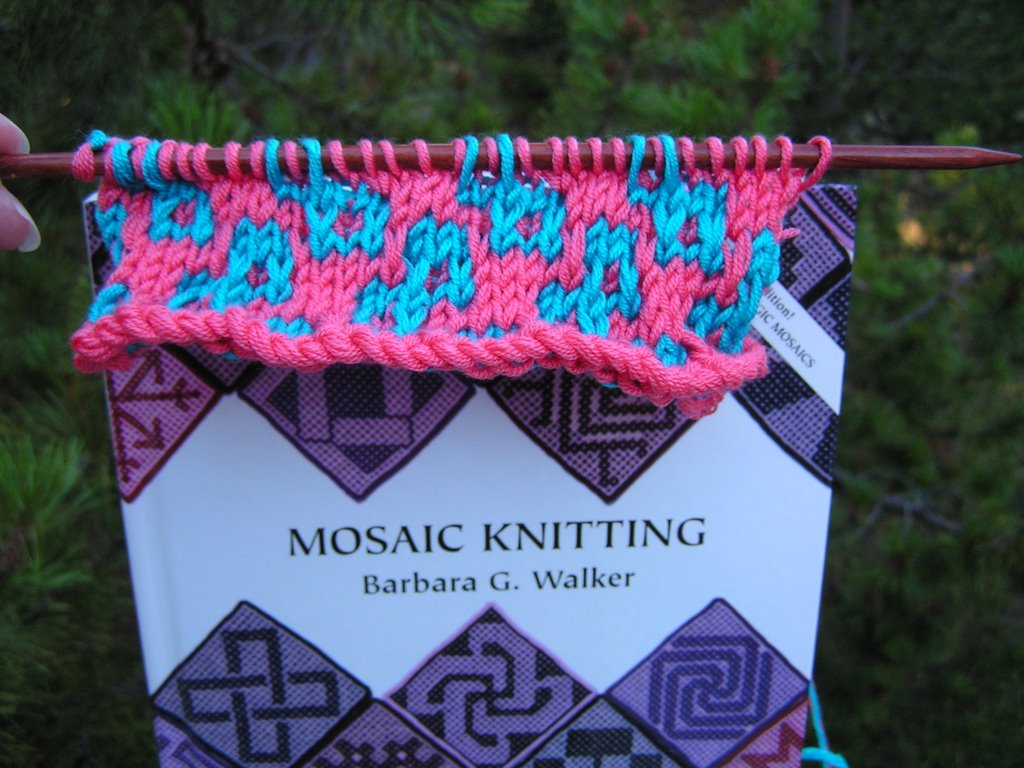


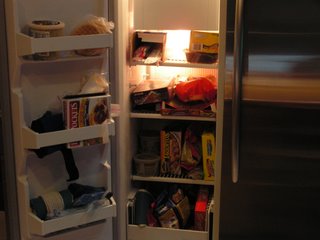 So here is mine. It is clear looking at this that we live only on frozen junk food and there is no real food in here. From reading what's in Bonnie's freezer vs. what is in mine it is clear she is a good mother who cooks real food for her family and I am a slacker who orders way too much take out! Oldest item - frozen chicken breasts in a ziplock - wonder how old those are! Best surprise - I have LOTs of margerine - don't have to buy that for awhile. Worst surprise - there is nothin but junk in there!