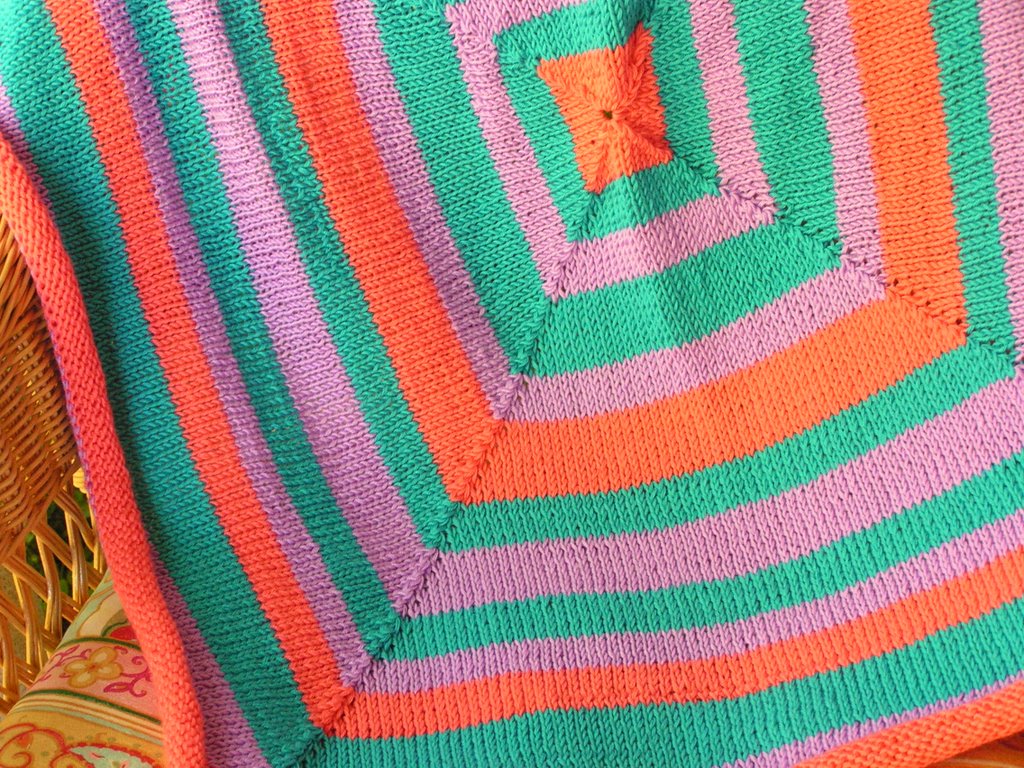
 I have finished the baby blanket and am calling it a "Circular Mitred Square Blanket". I am very happy with how it turned out. I couldn't get the photos to show the colors very well but you can get the general idea. I made it with Lions Brand Microspun and I love this yarn. It drapes really well and is very soft. Plus it can go in the washer and dryer which is a big plus for a baby blanket! I now need to try to block it because the edges are curling up a bit. Several of you have asked for the pattern so I'll give it a shot. I've never written a pattern for others to use so please let me know if you have any questions.
So here's the pattern. This blanket is worked in the round from the outside in so you start with A LOT of stitches on the needles. I wanted my blanket to be about 28 inches wide so using a size 9 circular needle I cast on 128 stitches per side for a total of 512 stitches! Basically you need to do a swatch with your yarn to figure out how many stitches per side and add 3 per side. I cast on 128 stitches, placed a marker and did that 3 more times making the last marker a different color so I knew where each round started. Then you join being careful not to twist (I twisted and you should have heard the explatives!)
Round 1 - *knit 125 stitches, knit 3 together* repeat from * to * to the end of the round
Round 2 - knit
Round 3 - *knit 123 stitches, knit 3 together* repeat from * to * to the end of the round
Round 4 - knit
Keep this going with all of the odd rounds decreasing by 2 stitches.
Then when you get towards the end - for me it was 12 stitches per section - I started decreasing every time I went around. Then when I was really near the end - about 12 stitches total - I cut the yarn long and used a needle to thread through all of the remaining stitches than pulled it tight light a hat but being careful not to let it pucker. At what point you need to start decreasing every round and then pull together will vary depending on how thick your yarn is. The thicker the yarn the sooner you'll need to do it. The thinner the yarn the closer you can get to the end. You just need to watch it so you don't end up with a stem!
A note about stitch markers - I used them and it really helped because I didn't want to have to count each row but on the rows when you knit the 3 together you move the stitch marker one stitch to the right so it will be in the right place the next time. For example - if it is knit 121 then knit 3 tog - you knit 121, slip the marker off, slip one knitted stitch to the left needle, slip the marker on and then slip the knittied stitch back to the right needle and then knit your 3 together. Why only one stitch over when the sections are decreasing by 2 each? Because you are losing a stitch on each end of the section. Hope this is helpful and not confusing!
Thanks to Helen for pointing out I forgot to say how much yarn I used! I used 2 skeins each of 3 colors but I had some of each color left so probably no more than 5 skeins total yarn. A lot will depend on how many colors you choose to use and how you stripe it.
Bury the ends. That's it! You can stripe it however you want. If you want to know the stripe count I used or if you have any questions just send me an e-mail at lahamltAgmailDOTcom. This pattern is copyrighted by me - please use it for your personal enjoyment but not for profit. Have fun and if you do knit one of these I'd love for you to send me a photo.


14 comments:
Your blanket is gorgeous. I like all the bright colors. The directions look pretty easy to follow. That's great that you designed it yourself!
P.S.-You should send your link here and ask her to post it on her website. She put my Ticker Tape Purse and Shrug on there and I have had tons of hits! It is definately pretty enough to share with many others.
Cool - thanks Kish - I'll give it a try! Also I have to learn how to make a word link to a website rather than typing the whole thing . . . .
Allison, that is beautiful! I bet Lion Cotton Ease would be great for this, too.
Do you mean a hyperlink? If so, it's very easy in blogger. When composing a post, first go to the website you want linked and select and copy the address. Then go back to your post and highlight the entire word you want linked. While it's highlighted, select the little icon that looks like a sideways figure 8 on top of the earth from the toolbar. A box will open and you paste the address of your site in. Hit enter and your word is linked to the site.
Now you know everything I know about blogging. LOL
I'll be checking to see if your pattern gets on the list :).
Adorable.. you did a great job.. !! Now that you posted the pattern I can try it.. !!
I've been trying to find a pattern like this for a long time.
Thanks for sharing. Great job!!!
I love your blanket!! I just finished two blankets and I would like to make one for my son and the pattern that I was knitting was kind of boring this looks like a lot of fun. How many rows did you knit before you did a color change?
Thanks
Maylene
This is a very beautiful blanket. I am adding it to my list of things I want to knit in this lifetime....I may need to live to be 110 to accomplish it all.
Simply stunning! A must-do for me to use up my stash!!!
Thanks for posting the pattern for all of us to knit!
Thanks HEAPS for this pattern... I have been searching all night for an easy to knit round blanket.
I have a fair bit of experiance knitting on straight needles & have been working up the courage to try something on a circular needle i was given for my birthday.
As i am just learning to knit on circulars, i wanted something that didnt require changing to double points and a whole heap of fiddling around & i found it with your pattern!
I have just cast on my 128 stiches & am rearing to go!! After reading your pattern carefully first, i am sure this will be a sinch to knit...
THANKS AGAIN (:
Good JOb! :)
good post :)
The christian louboutin store was designed for the ladies. Since the pumps was born, the ladies life become colorful. The christian louboutin evening pumps are the god's masterwork. Who invited thechristian louboutin pumps? Seldom people knew, but I think every lady would be grateful for him. Among the countless pumps, the christian louboutin peep toe is the most outstanding ones. The elegant pattern, the delicate style all mold the ladies perfect leg profile. Flowers in the spring of 2011 creeping, up from hair to clothes continue to footwear, have had a brilliant up. In such a glamor, spring and summer flowers now here. Romance is a woman's mood, exquisite flowers just right of expression in our gestures, the woman, how can we not love the romantic temperament so that they distributed the flowers do? 2011 flowers bloom will enjoy different poses! The Christian Louboutin 2011 Sandals also can adds the hright of the ladies, it bring surprise to the short lady. Especially the red sole of the louboutin heels, magic and sexy, many ladies are crazy. The red sole, the first feature of the Christian Louboutin stroe.
Post a Comment